
Before & After: Guest Bathroom
A Literal Sh*t show
This bathroom is the one central bathroom in the house that most of our guests will use when visiting. Despite being near the main living area, this is a full bathroom with a shower!

The original bathroom was a great size but definitely had some deficiencies. The shower for one was quite small for the two tall people that live here, and the vanity and lights were jammed up against the left wall leaving an awkward gap between the sink and the shower. We wanted to rework the space while keeping all the existing plumbing and toilet where it was to cut down on costs.
Check out the full room makeover on Episode 4 of The Home Reno Series!
If you are looking for a full list of products used, check out our blog post:
Before and After
We started with a pretty dated space with a shower that was too small and finishings we felt didn’t match the style of the house. Since this was our one centrally located house bathroom that our visitors would be using, we wanted to do something a bit different. We wanted to have a little fun with it while keeping it clean and fresh. We wanted something with personality (yes, bathrooms can have personality!) It’s a small bathroom after-all, and one we wouldn’t be using every day, so we weren’t too worried about getting sick of the patterned floor.


This was the first time we tore a bathroom back to the studs and built it out from scratch ourselves. We’ve done some small powder bath makeovers in the past, but we’ve never built out a custom shower ourselves. In our last home, my uncle did all the heavy waterproofing and tile work in our primary bathroom following our design, so this was pretty new to us! We had tiled before (see our previous kitchen here) but never a shower.
A note on the bathroom door, we haven’t decided yet if we want to paint all the doors in the house white or leave them wood, so we’ve left them as is and will decide when the house is done.


We made a couple of key choices here to save some money. First, even though we would be completely rebuilding this bathroom from the floor up, we did NOT change the layout or position of the plumbing. Moving sinks, showers, drains, and toilets can get VERY expensive quick, so we kept the layout the same and just made some small adjustments to the position of the vanity and size of the shower.


The second way we saved a few bucks was by choosing a big box store tile, but installing it in a less traditional way. Originally I had picked some 2x8 matte white wall tiles that ended up being $30/sq ft, which made tiling the walls very expensive. Instead, we picked up 3x6 traditional gloss white subway tile, and hung them in a stacked vertical pattern. These tiles were $0.15 each ($1.20/sq ft), which made doing even the entire wall FAR cheaper than just doing the shower with the original tiles.


We also tried to save money and time by opting for an Ikea Vanity, and then hacking it with our own wood doors. If we had our time back we would have just built something from scratch (more to come on that). What we saved in money we wasted in time as this project was way more of a hassle than it was worth. We could have just kept the stock doors that came with the vanity, but they had gotten rid of the oak front doors and gloss white doors lacked contrast given all the white existing in the room. We will have a full video and blog post on this project coming soon.

And lastly, we saved a TON of money by doing this ourselves. The only thing we hired out was the glass, which was honestly a nightmare and we were left with the messiest and worst caulking job we’ve ever seen. In the end we learned a bunch of new skills that we will be able to use when we tackle our next project, our primary suite!

Color & texture
I love a bright bathroom, we wanted to keep this one light and clean! The white walls and gloss tiles help bounce the natural light from the skylight around the room. We love the patterned floor tiles; it’s almost like an art piece for the floor! We mixed matte floor tiles and wall paint with gloss white wall tiles and matte black fixtures for a contrasty look.
Details
The Tile
We decided to go with a pattered tile on the floor. We chose a porcelain matte tile; they are anti slip (KEY) and they feel soft like velvet under your feet when you’re in the shower!

We took the tile all the way into the shower and chose a tilable linear drain for a seamless look. You can see a list of all the products we used here.
The Shower
We were sort of forced into a neo-angle shower because of the strange, angular shape of the bathroom. The previous pre-fab shower was far too small for 6ft humans; washing your body would result in your elbows hitting each side of the shower and walls. We had the space to make the shower larger so we moved it out about a foot! We love how the linear drain turned out here.

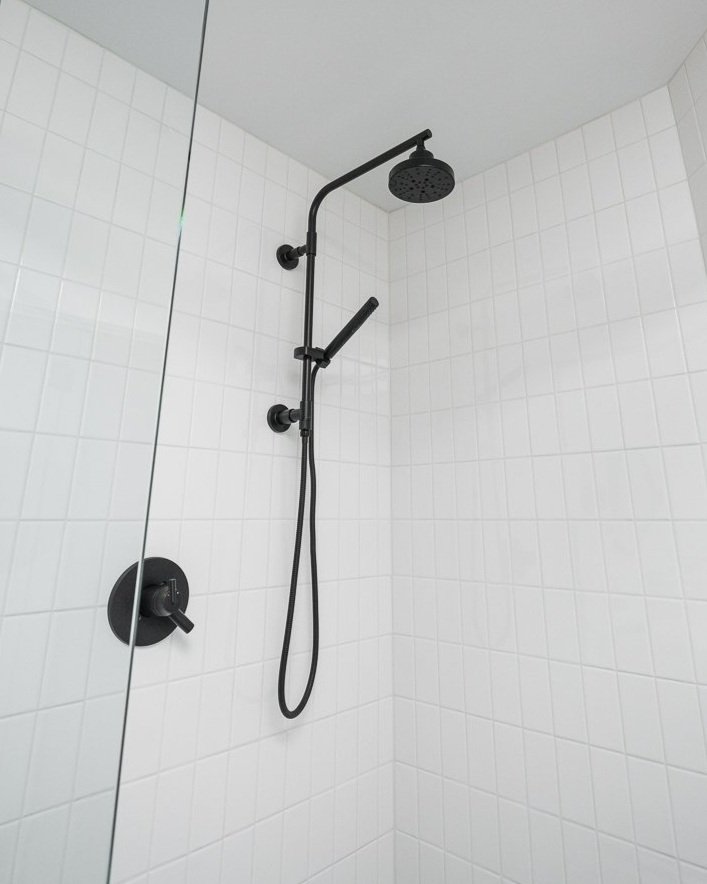
“How easy is this to clean” is a question I ask myself every-time we makeover a space. I knew when choosing shower fixtures that I wanted the showering experience to be GREAT but I also knew I needed a hand shower to easily clean the shower and rinse the floor. I’ll never install shower/tub fixtures without a hand shower; they are ESSENTIAL!
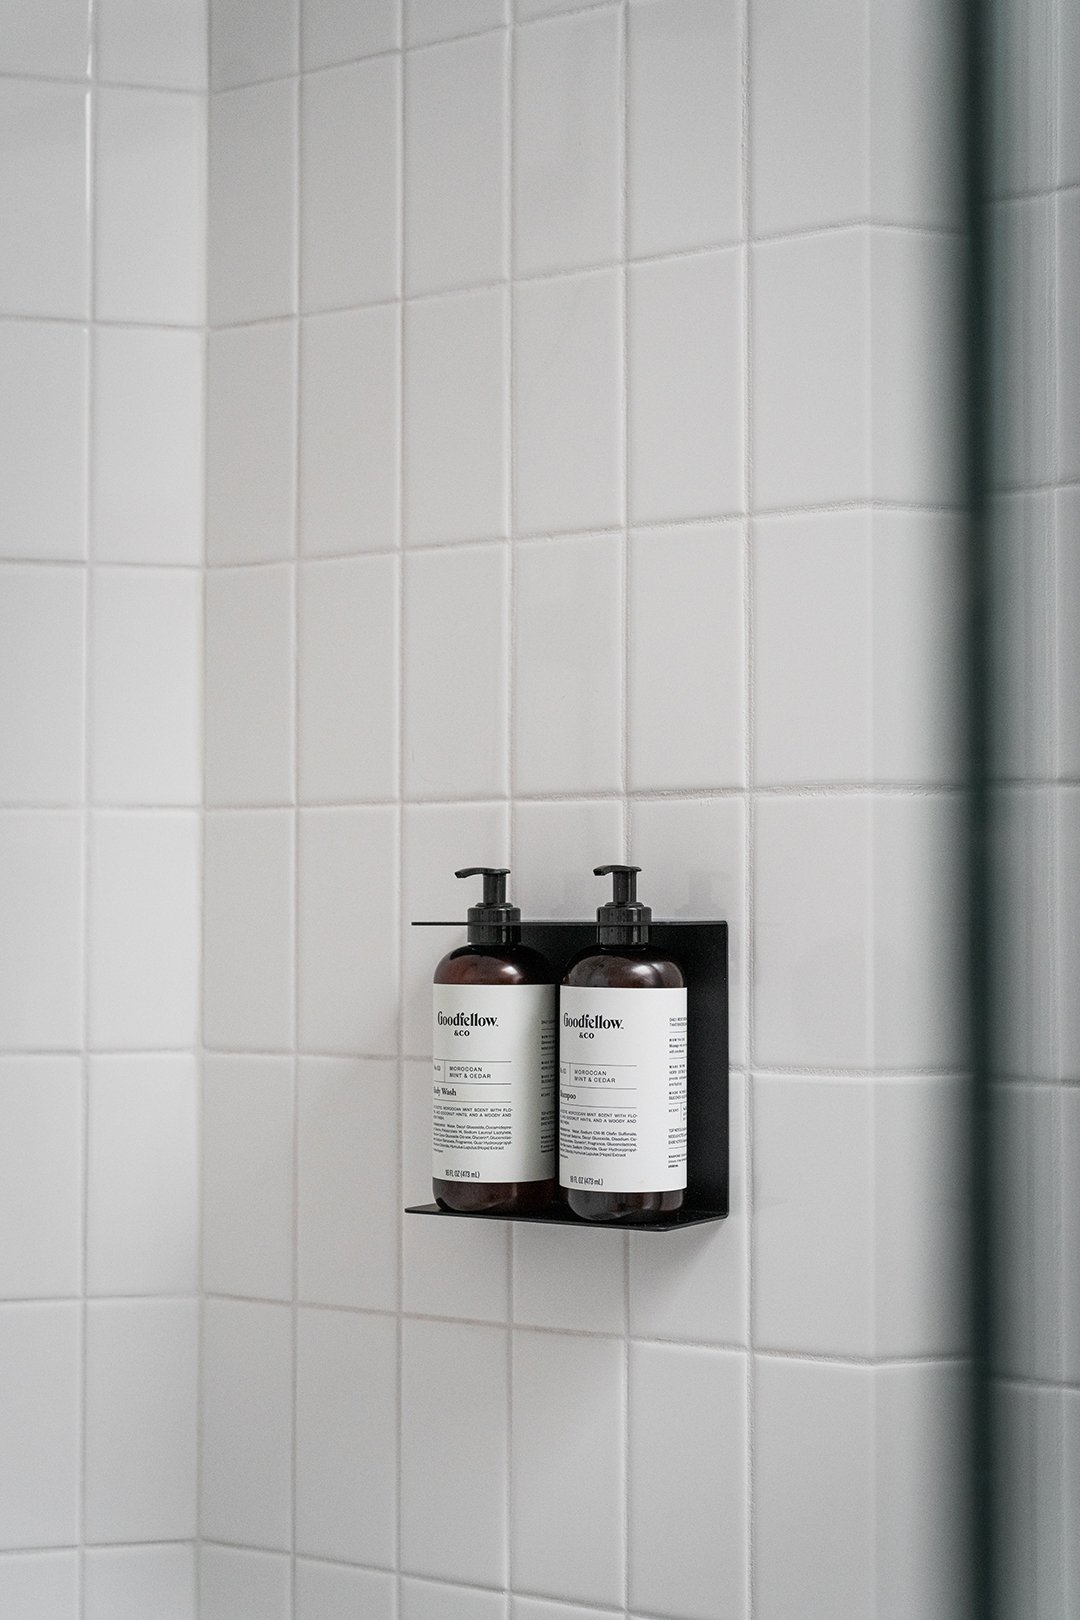
I am not a huge fan of the shower niche, especially in a bathroom that isn’t being used every single day. Since this was more of a guest showering experience, we installed a wall mounted soap holder that holds body wash and shampoo. If I had my time back I would have ordered a three slot holder and include conditioner, but I stashed some in the drawer next to a bunch of travel size amenities like extra soap, floss, shave gel, and moisturizer for our guests to use. I like to keep the bathroom fully stocked! I’m the type of person who travels with my own shampoo and conditioner, and in my experience a lot of our guests do too. But it’s all there if they need it.

We opted for this Goodfellow brand from Target because it’s good looking AND affordable.
The Accessories
Another must have when it comes to bathroom remodels (and really any space) are hooks! We added two matte black hooks on the wall to hold these lush waffle towels (also from Target). The hooks match the lights, mirror, shower hardware, and toilet paper holder.


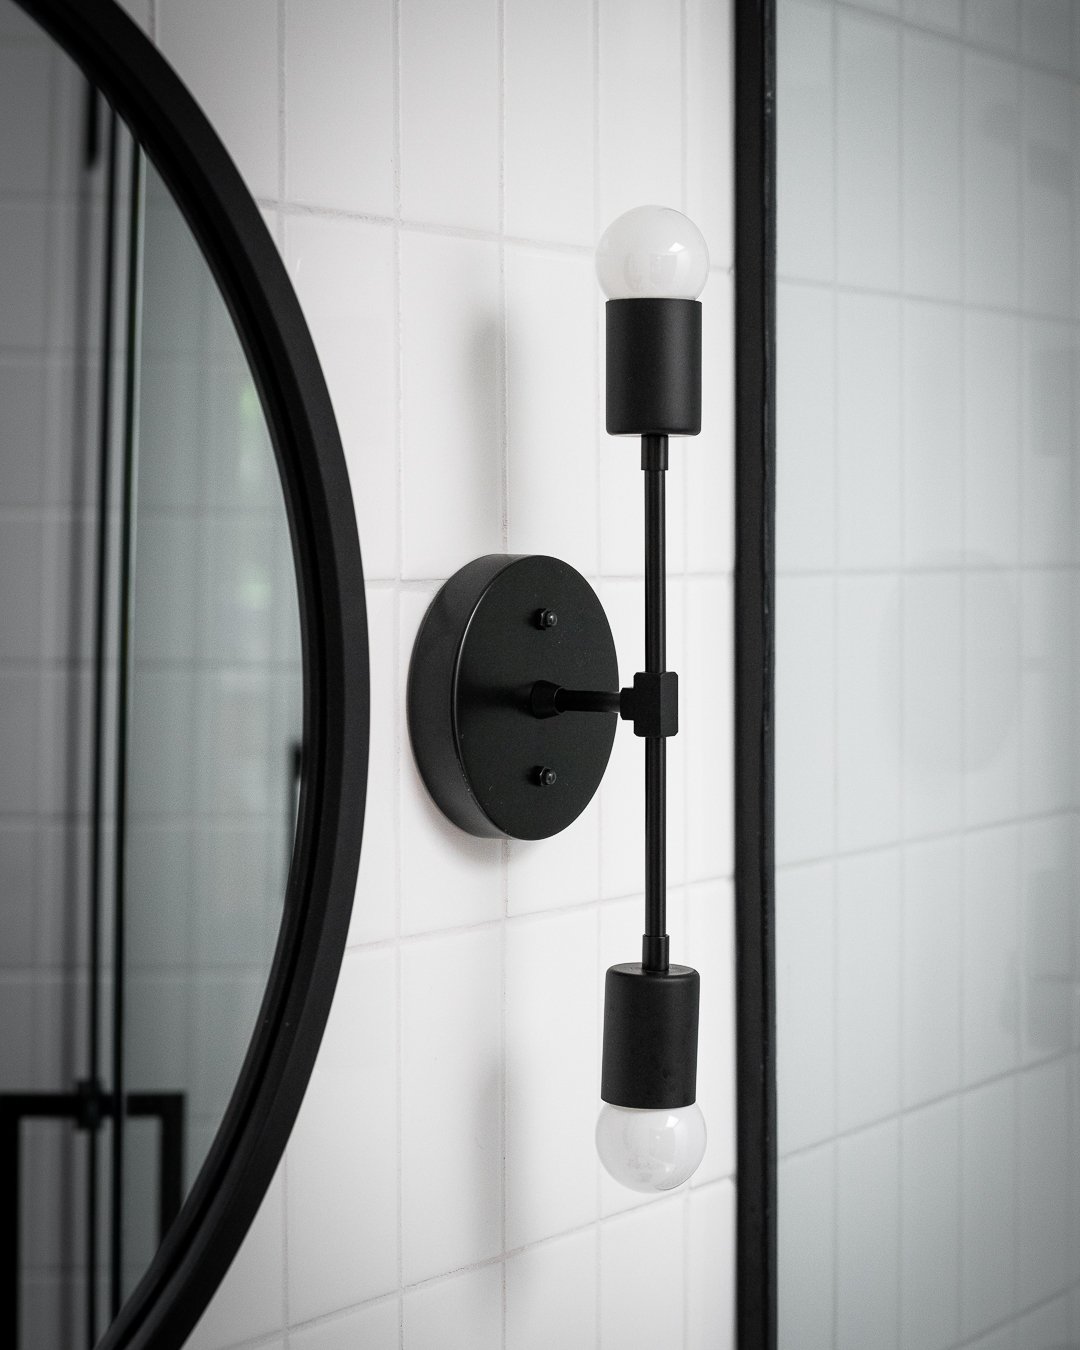
A little trick for keeping matte black metal finger print free: clean them with windex and use a microfibre cloth to buff it out. Works SO WELL!

The Giant
Reflector
The bathroom has a skylight and we wanted to keep this space as bright as possible. We painted the walls our favorite Decorator’s White by Benjamin Moore basically to act as a giant reflector to bounce the light around the room. This time we used the Aura Bath & Spa Matte paint to hold up better in high humidity environment.
Wall color: Decorators White by Benjamin Moore
This was the last episode of Part 1 of The Home Reno Series. If you haven’t seen the rest of the episodes check out the full playlist here! We’re also deep diving on all of the behind the scenes from each episode over on the Aftershow Edition of our podcast Tuxedo Time!
Becki and Chris
Instagram: https://www.instagram.com/beckiandchris
YouTube: https://www.youtube.com/c/beckiandchris
Twitter: https://twitter.com/beckiandchris