
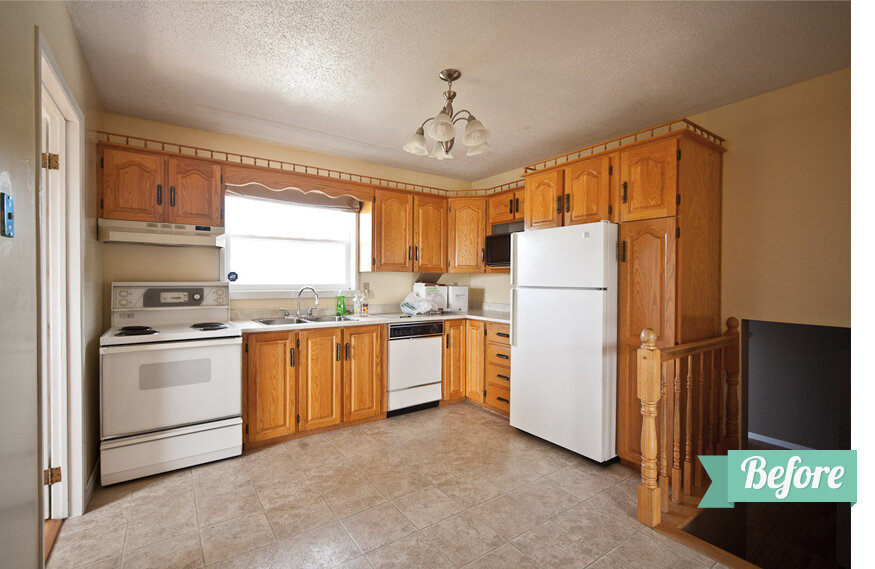
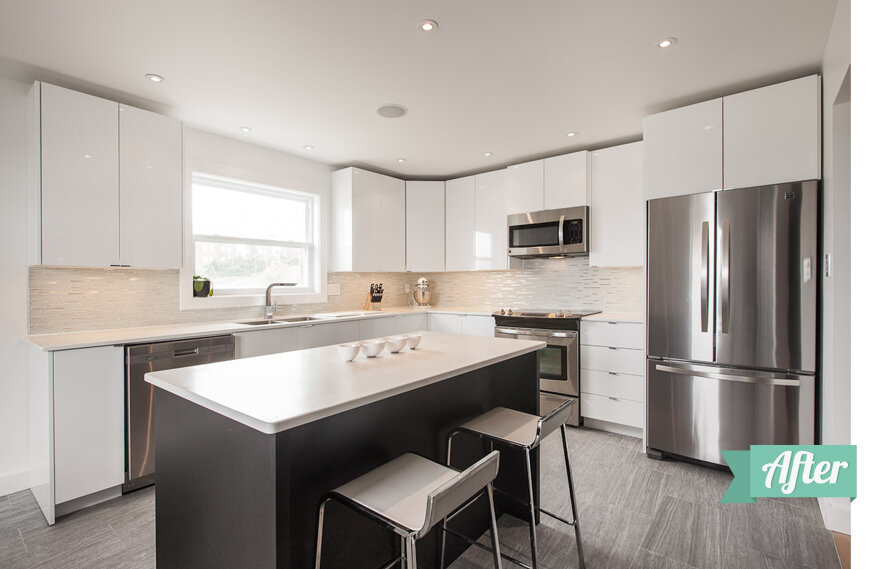
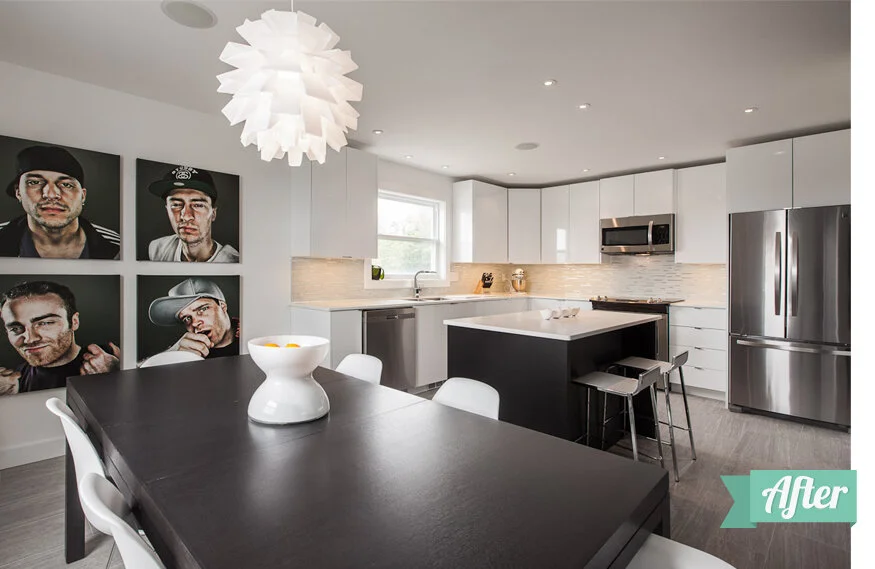
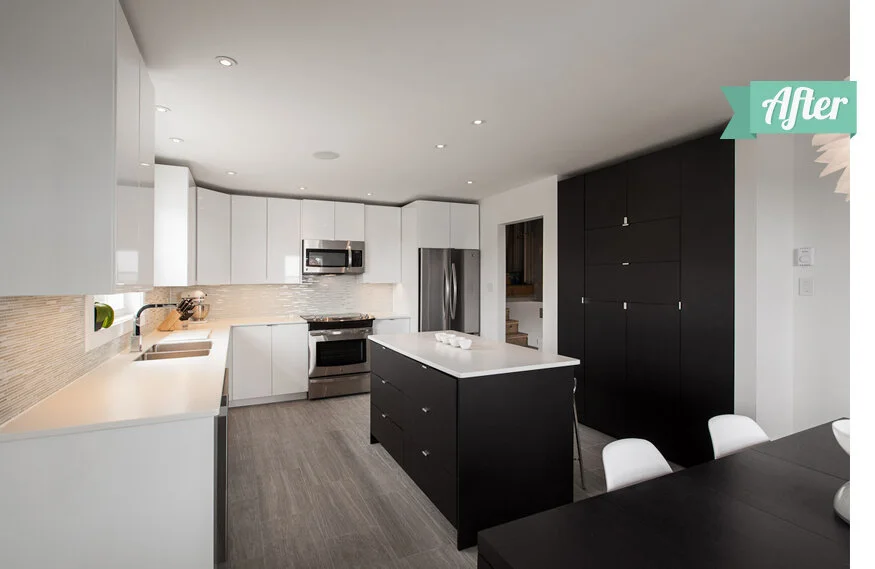
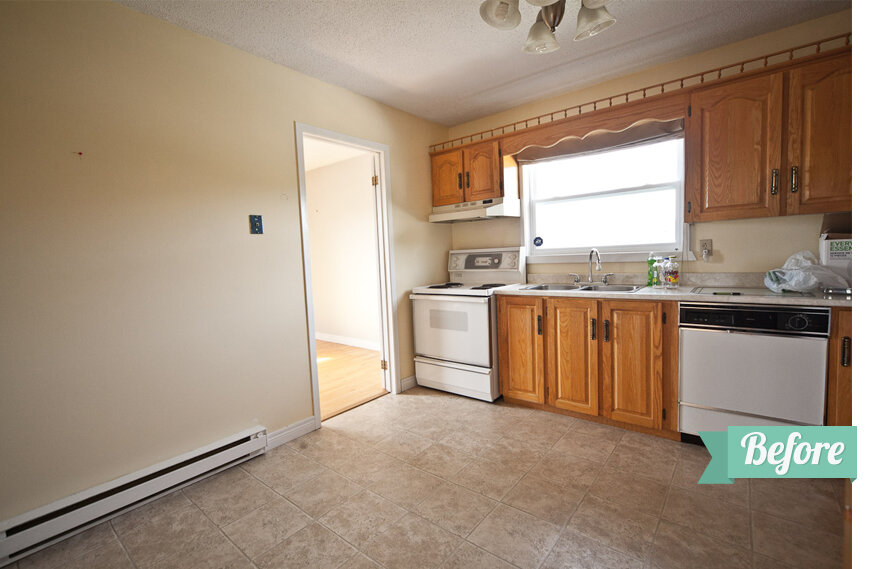
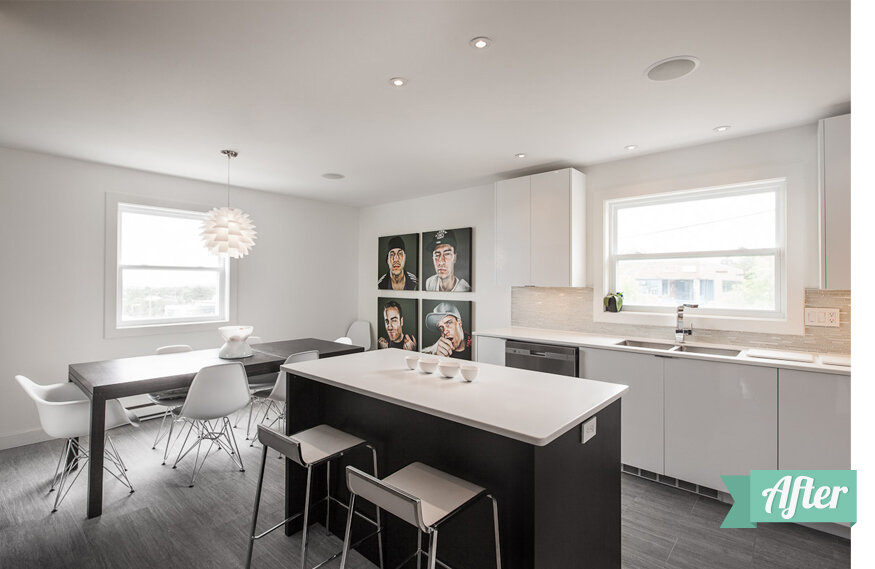
The Kitchen Before and After
We have been living in the house for just over a year and we finally have the kitchen totally finished. We started tearing it out the first day we moved in, and 6 months later we had a fully functional kitchen just in time for Christmas. It's taken us an additional 6 months, however, to finish a few small things like touch up plastering/painting around some of the recessed lights, adding our backsplash, getting art up, etc. I've heard people say that the last 20% takes just as long as the first 80%, which is definitely true in our case!
We previously wrote about how we wanted our kitchen to look and how we were going to make it happen. We made a plan and stuck with it.

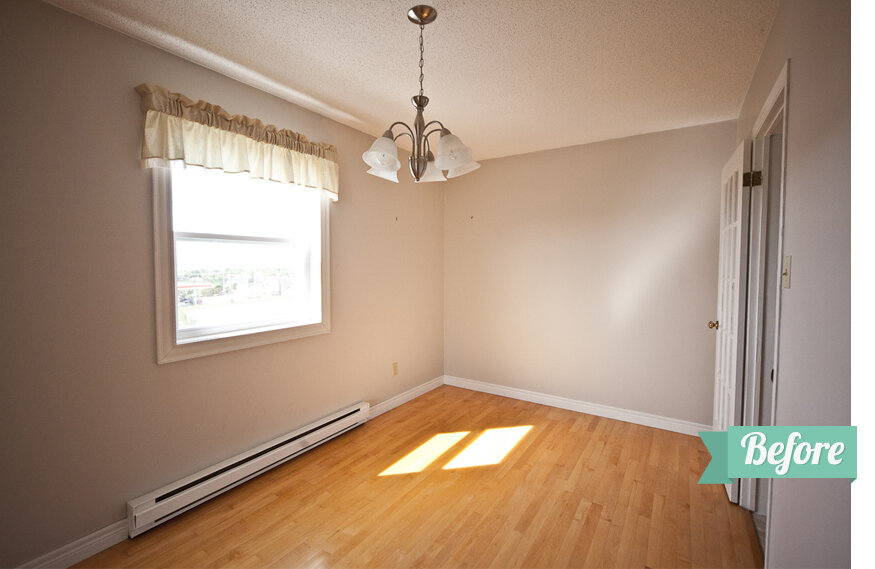
In summary, we took out the old stair case, re-drywalled the ceiling to get rid of the stucco, removed walls (safely), got rid of the French doors, tiled the floor, added lighting, added in ceiling speakers and had my uncle help us install new cabinets. It was a lot of work and a long process but now we can finally reveal the finished product! Here we go!
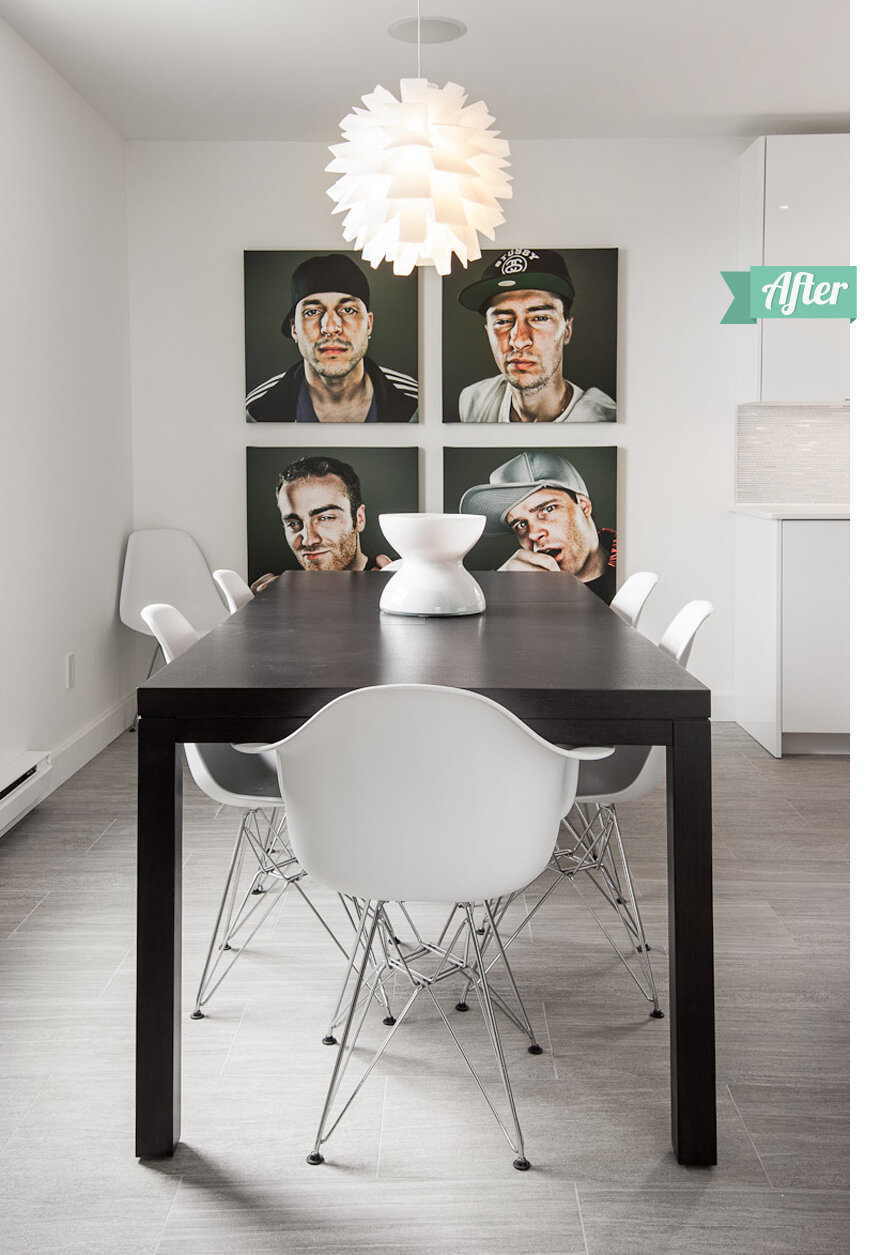
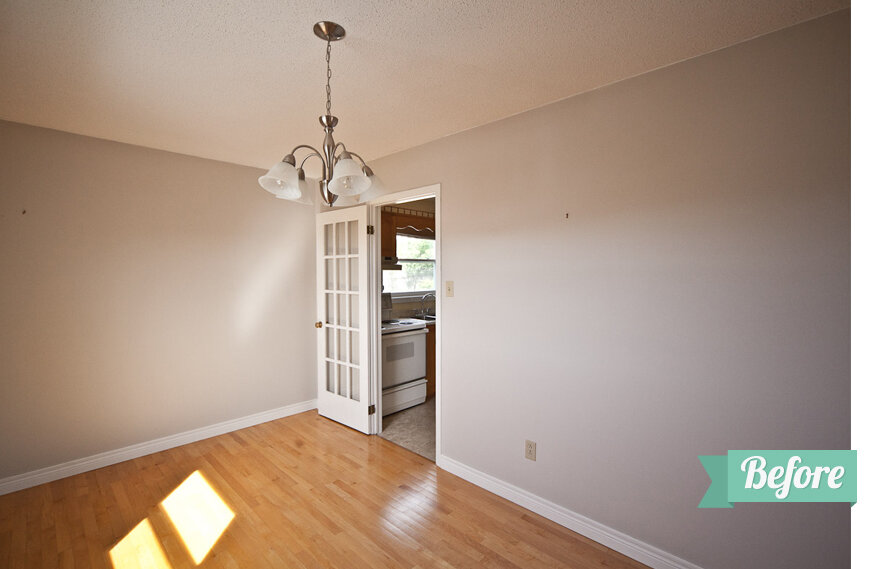
Before & After
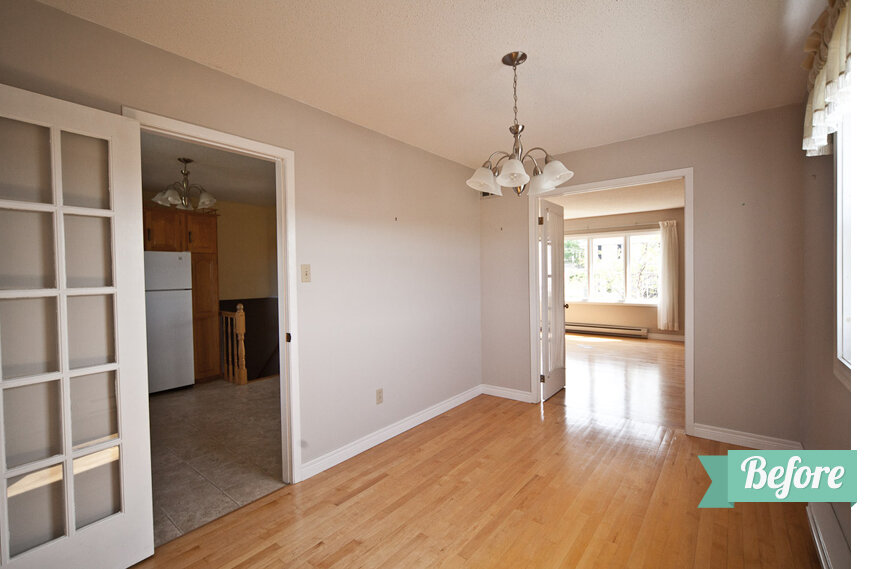
Here is the view from the corner of the previous kitchen where the wall used to be.
The Details
We decided to finish our backsplash with glass and stainless tiles. We threw around lots of ideas and brought home numerous tile samples - it was a really tough to choose! The one we ended up going with was my favourite so I was happy to see them up. Chris also liked them the best, but he didn't like that they happened to be the most expensive!
The goals for storage were to maximize efficiency and maintain the clean, minimalist look of the kitchen. For easy access to the spices, we put them in the top drawer next to the stove. We decided to use one of the larger drawers in the island for cutlery storage, which works well because it's directly across from the sink and dishwasher. The cupboard above the dishwasher houses the plates and bowls. Minimizing the distance between the dishwasher and storage is an easy way to cut down on time spent doing the dishes. We disguised our garbage and recycling bins in the "bank of drawers" next to the cutlery drawer. While it has the appearance of three drawers, it's actually just one large pull out mechanism. We decided to create a "toasting station" in the built in wall cabinets. The door flips down and the hinges are strong enough to use it as a work surface and support the toaster. When we're done toasting, we just push the toaster in and close it all back up.

Lighting
When we posted our ideas in the Mood Board post we talked about the ablility to dynamically change the lighting depending on the mood we wanted to create. Of course in the day it's hard to demonstrate this, but in the night, you have full control. All the lights in the kitchen are dimmable. There's a separate dimmer for the perimeter recessed lights, the two recessed lights over the island, the dining room light fixture and the under cabinets lights. We also added some color LED strip lights over the cabinets which are on their own switch. Using Insteon dimmers allowed us to program commonly used lighting patterns or "scenes". The scenes can be activated from our phones or by double tapping certain dimmers we've programmed to be controllers.
The photos below show a few of our commonly used scenes. In image 1 the lights are all on full. Image 2 shows all lights partially dimmed. Image 3 has just the island and under cabinets on at a low power, great for preparing and enjoying a midnight snack! Image 4 is our "movie mode" that provides a warm ambient glow. It's dim enough to not be distracting when watching a movie in the next room, yet bright enough that you can get food or a drink with out tripping in the dark or having to turn on the lights.

As I mentioned previously, we added color RGB LED's above the cabinets. Below are just a few examples of some color options. As you can see the mood can totally change depending on the chosen color and brightness, but be careful because it can get tacky really quick. For example, a pure red or blue starts to look like a bad 80's basement bar (we saw one while we were house hunting). Not the look we are going for.
