The Living Room Before and After

It's certainly been a while since we published the progress post on the living room, but finally, the big reveal is here! As we mentioned in our mood board post, when we first viewed the house, it was staged as a traditional formal living room. (Yeah, those traditional rooms people don't actually use!) When redesigning the space, we wanted a comfortable place to hang out, watch TV, entertain guests or even work. Our goal was to really just put the living back into the living room!

We saved a lot of money by purchasing our largest pieces of furniture from Ikea. We then paired them with a few good finds from Winners and a few higher end "splurge" pieces to complete the look (e.g. the Barcelona chair). Blending less expensive furniture in with choice higher end pieces is a great way to stay on budget without sacrificing the unique, high end look.

As with most of the other rooms in the house, the solid natural birch hardwood floor was in great condition. We painted the walls the same colour as the bedroom (Gray by Benjamin Moore). We kept the room neutral so we could pop in a different accent colour if we got bored or wanted to get a bit festive.
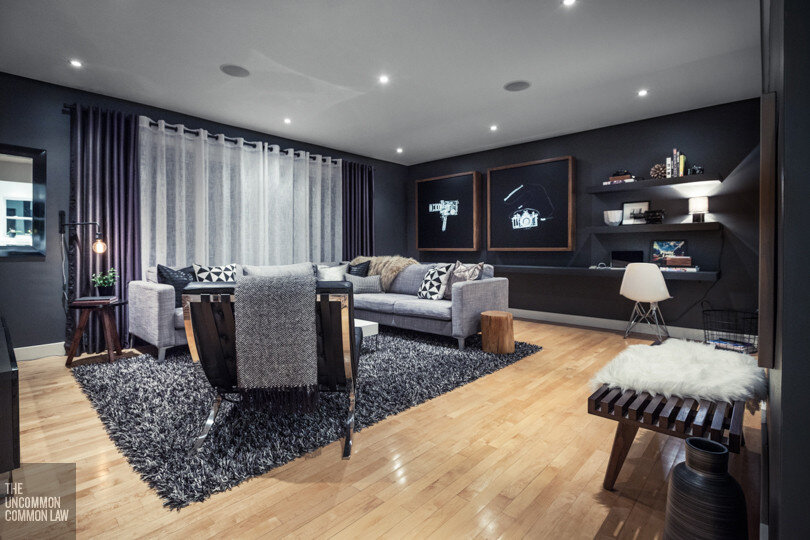
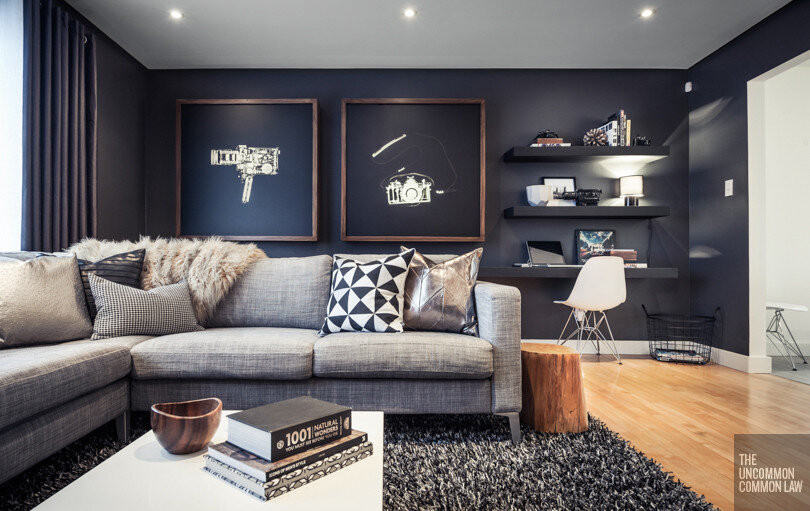
We ended up tossing the french doors, painting the walls, replacing trim, adding in recessed lights, wall mounting an ethanol fireplace, ditching the stucco and dropping the ceiling down to create a little architectural reveal to hide LEDs. And as you may recall from previous posts, we made a wooden slat wall for the TV and X-ray view boxes with surrounding custom floating shelves for the back wall!
The custom wooden slat wall warms up the space and acts as our media wall. The TV bench houses our set top box, router, DVD player, various amps, heaps of wires and general "TV junk". The wall the slats are attached to was actually framed up specifically for the purpose of concealing wires. Wires hanging down would have ruined the ultra clean look!

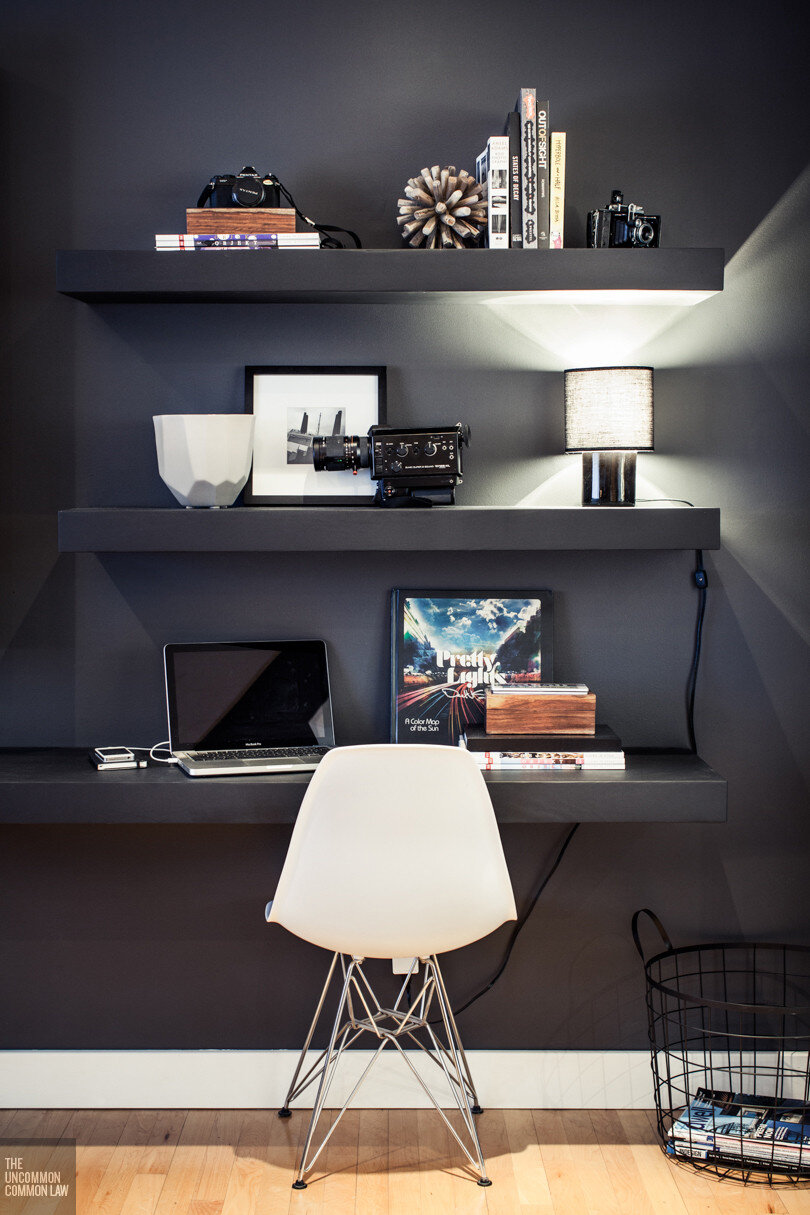
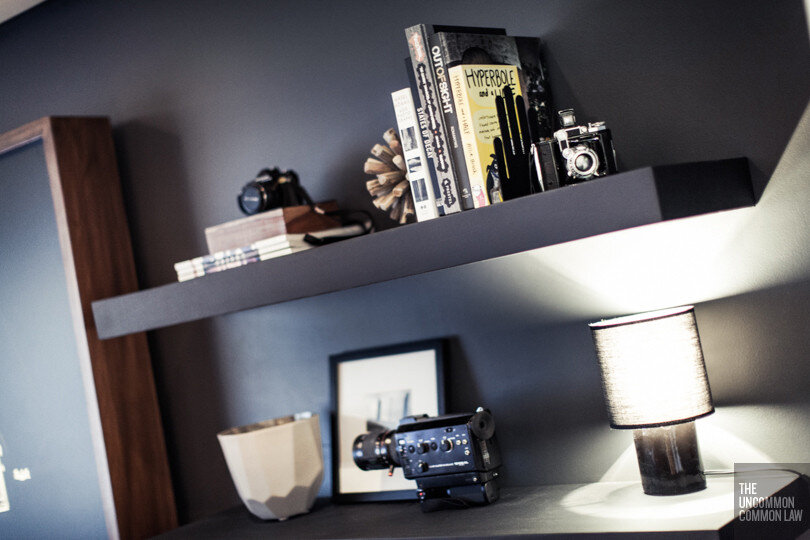
We built the floating shelves to also act as a mini study/work area. The wooden frames on the X-ray light boxes are the exact same walnut tone as the slat wall. The boxes frame the art and also house LEDs for backlighting. The prints are actual radiographs (i.e. "X-rays") Chris took of two of our old cameras, which are both sitting on the shelves immediately to the right! We'll post a full DIY tutorial on how to make your own floating shelves like these soon.
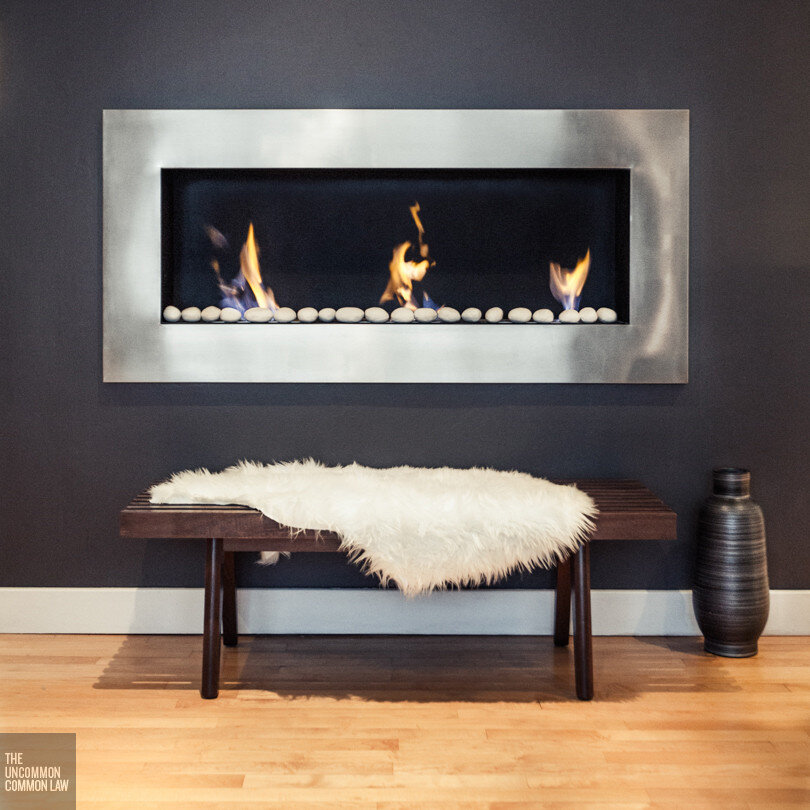
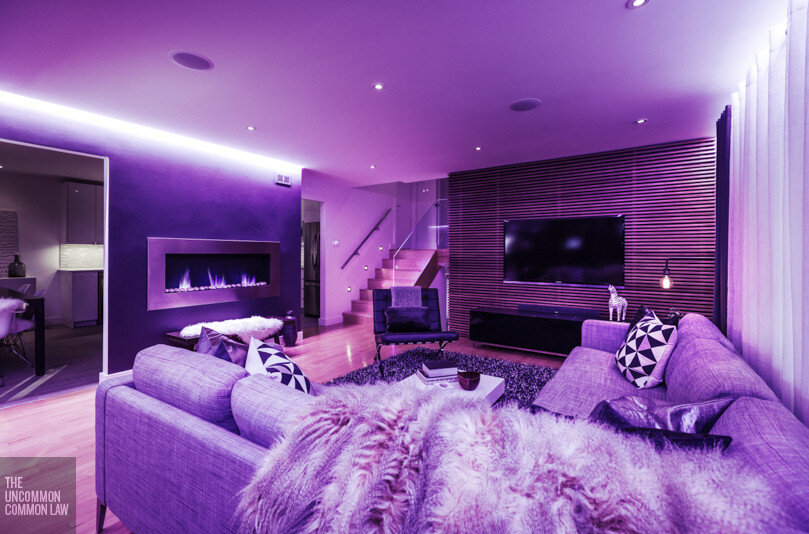
We originally wanted a propane fireplace but the cost was way out of our budget. We opted for an ethanol fireplace which we recessed into the wall that divides the living room from the kitchen.
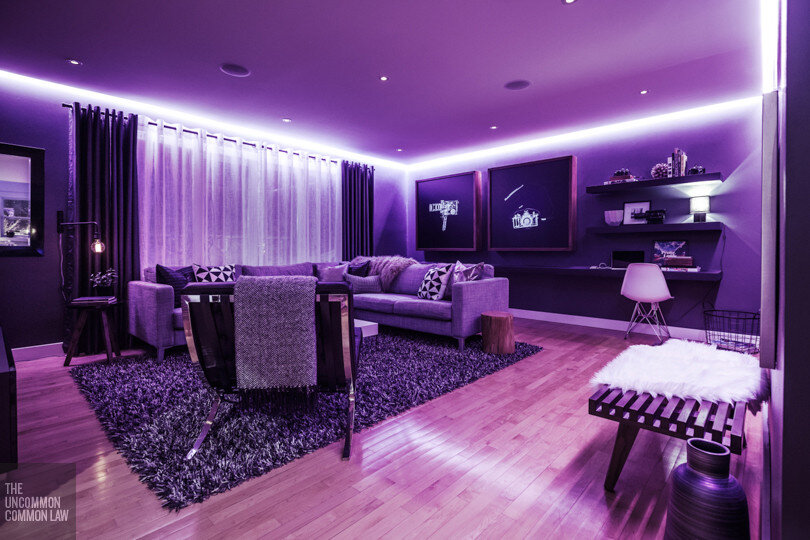
Lighting always plays a big role in our spaces. All the lights and lamps are on dimmers for complete control of the mood. Lights are grouped into commonly used scenes which can be activated from our phones or a keypad on the wall. The ceiling's reveal conceals RGB LED strips which can make pretty much any colour you want!
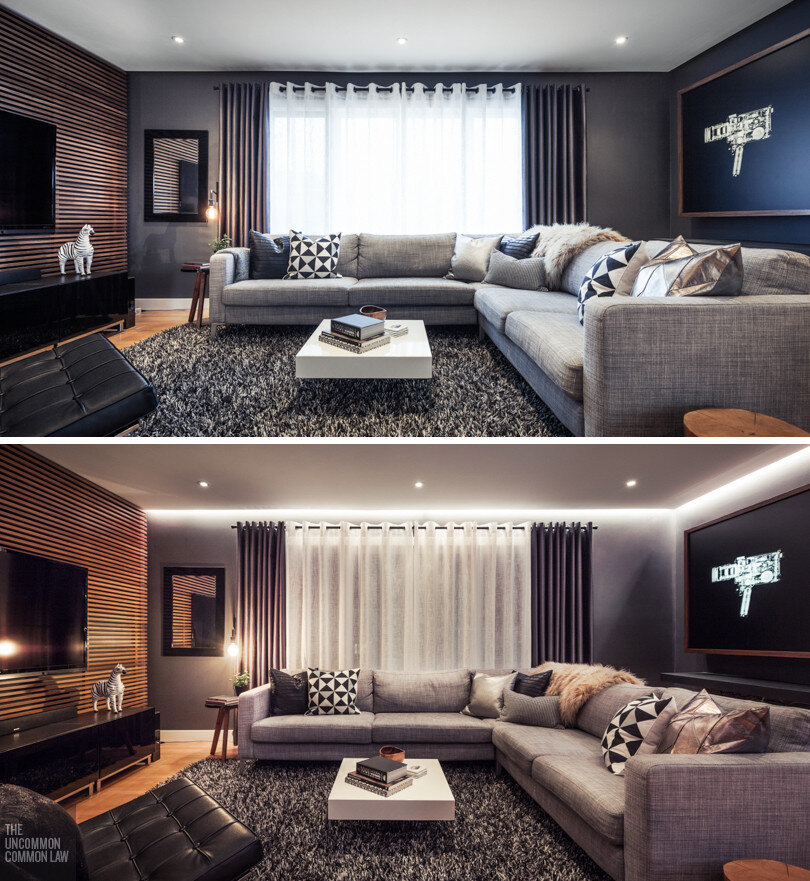
The next few images show two different scenes, one with just the recessed ceiling lights/lamps on and the other with the perimeter LEDs on and set to a pink-purple colour. You can also see the two in-ceiling speakers which are part of our whole home audio setup.