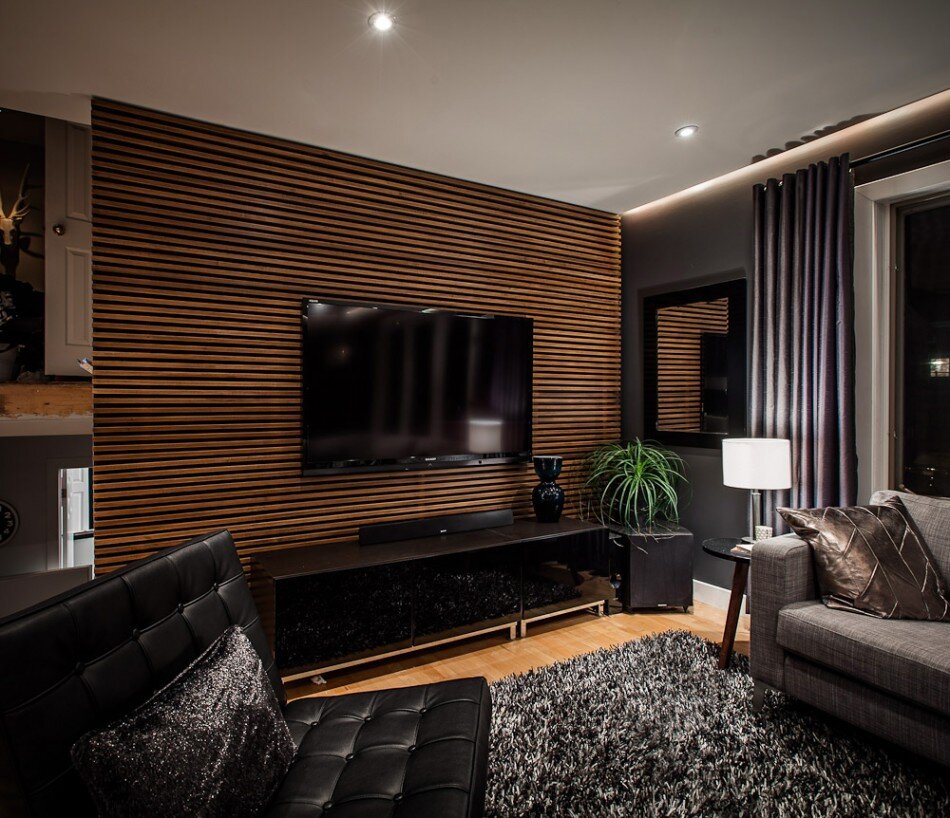
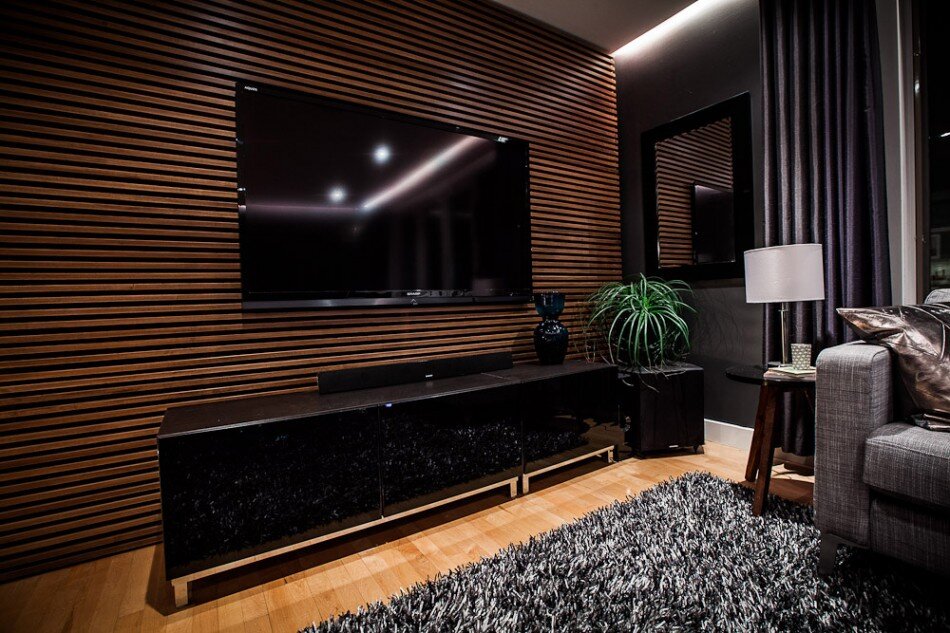
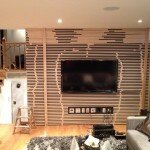
The Living Room Slat Wall
Becki and I decided early on we wanted a feature wall in our living room. Since the living room was also doubling as home to our entertainment center, we figured we could make it a media wall for the TV. What started with the idea of simply painting the wall an accent color, evolved to patterned wallpaper and then to textured wallpaper. We toyed with the idea of textured wall tiles, and even plastering the wall and troweling some texture into it ourselves. When we realized how many choices there were (and only one wall), we went back to the original mood board Becki created to refocus ourselves. Wood surfaces were something we wanted to incorporate into the room. We thought about making a stained wood wall, but wanting some depth, we ended up settling on a wooden slat wall.
After we agreed on the idea, Becki decided this was "my project". I had no idea how I was going to build it. There were no tutorials online that I could find (there were some similar concepts, but none that gave the exact look we wanted). But that's what I like about DIY projects. You can can do it your own way and have the satisfaction at the end of the day (read: months) knowing you created something from the initial concept, to the design phase all the way to implementation - all on your own. Yay for DIY! I didn't realize, however, that this was going to be one of the most labor intensive projects I've taken on (actually the ceiling in my office was just as bad).
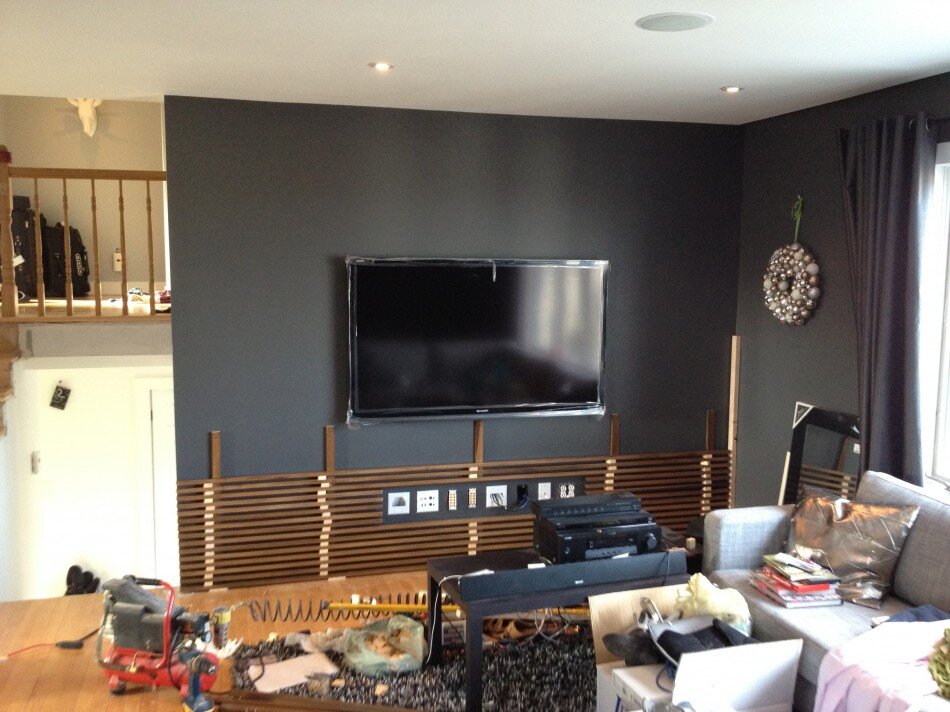
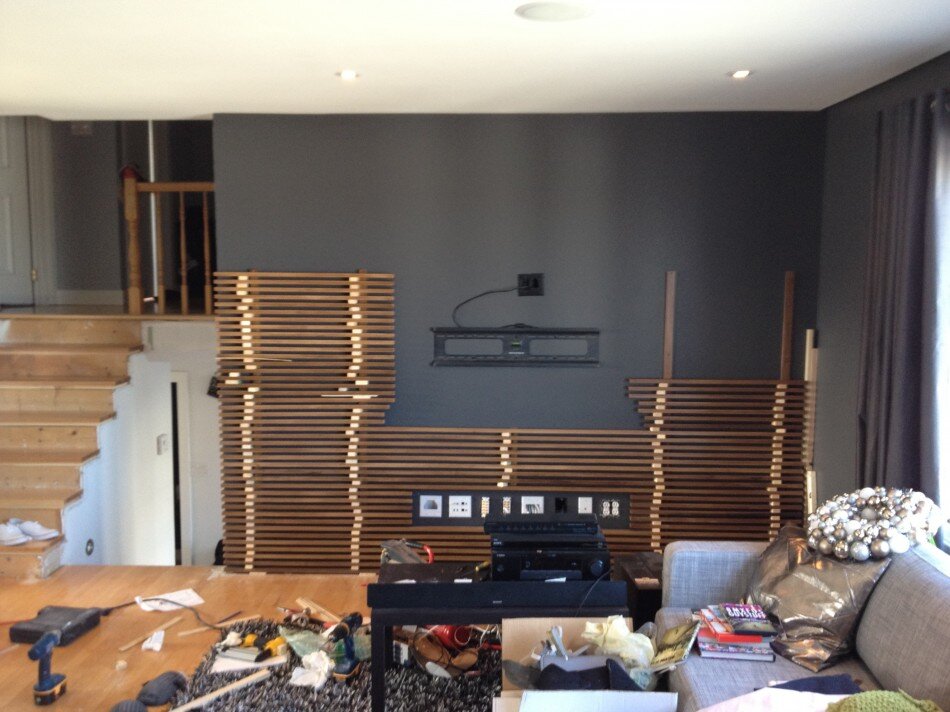
Being our media wall, I needed to fish wires through the wall for the TV. This is usually pretty easy; cut two holes where you want the wire to start and end and fish away with some poles. Since our house is a split level, however, the existing wall has some pretty burly floor joists at mid wall height that support the next floor up. Drilling through these would be a bad idea, so I framed up a new 2x4 wall. Using the TV wall mount's hole pattern for measurements, I made sure there were corresponding studs centered on the wall for secure mounting.
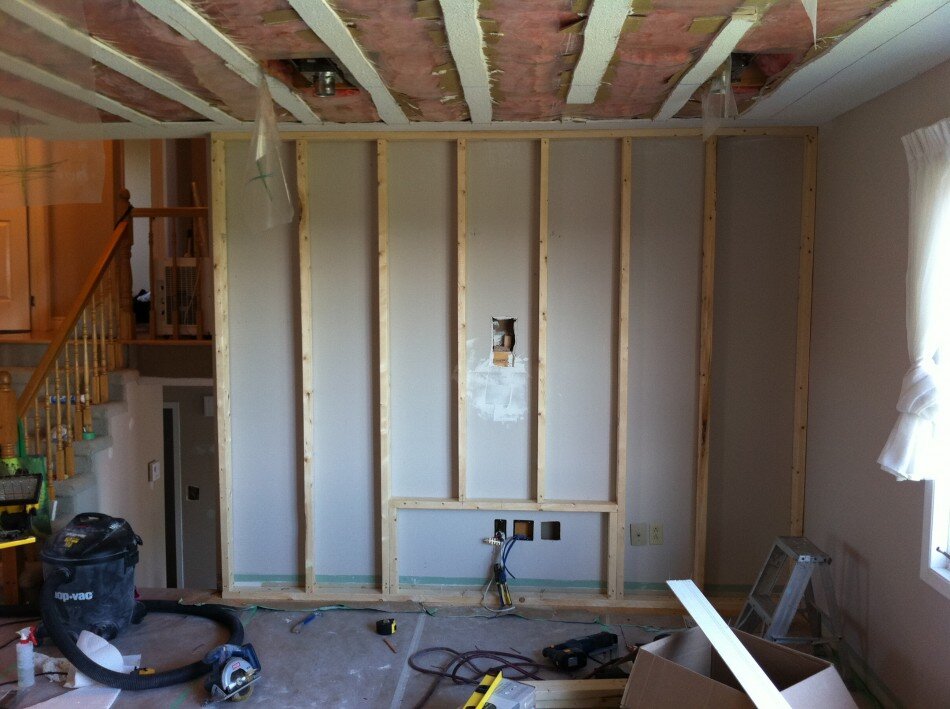
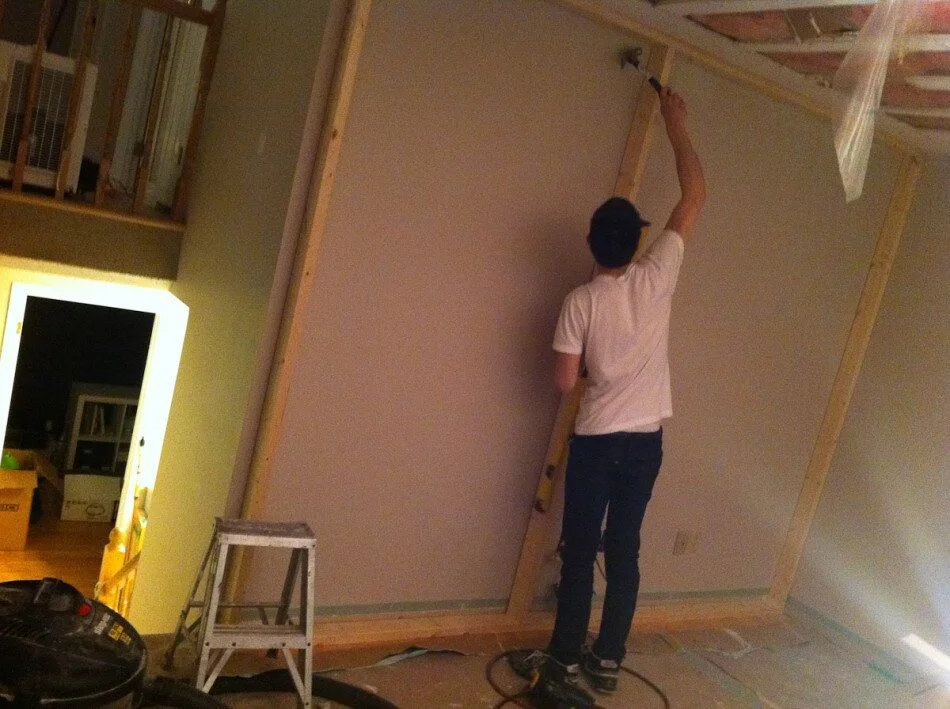
This wall would be the "hub" for our home's media center. I fished multiple speaker wire runs to in-ceiling speakers in the kitchen, living room, master bathroom, basement studio, production room and guest bathroom. In addition to this, I sent some HDMI runs to the laundry room and master bedroom. I also ran three lengths of shielded CAT6 ethernet cable from our network closet. Finally, four outlets were installed - keeping the AC lines away from the low voltage runs to avoid any potential signal interference. Midway up the wall adjacent to the TV wall mount, a recessed plug for power to the TV was installed, as well as a short HDMI run. I'll eventually make a dedicated post on the wiring of our house - there's a crap load of it.
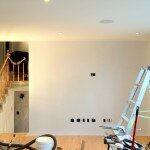
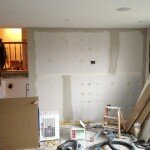
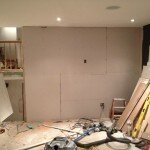
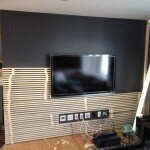
Once the framing and wiring was finished, I started the drywalling and plastering. Nothing too exciting here - screw, tape, skim, sand, prime and paint. We painted the wall the same dark gray as the rest of the room.
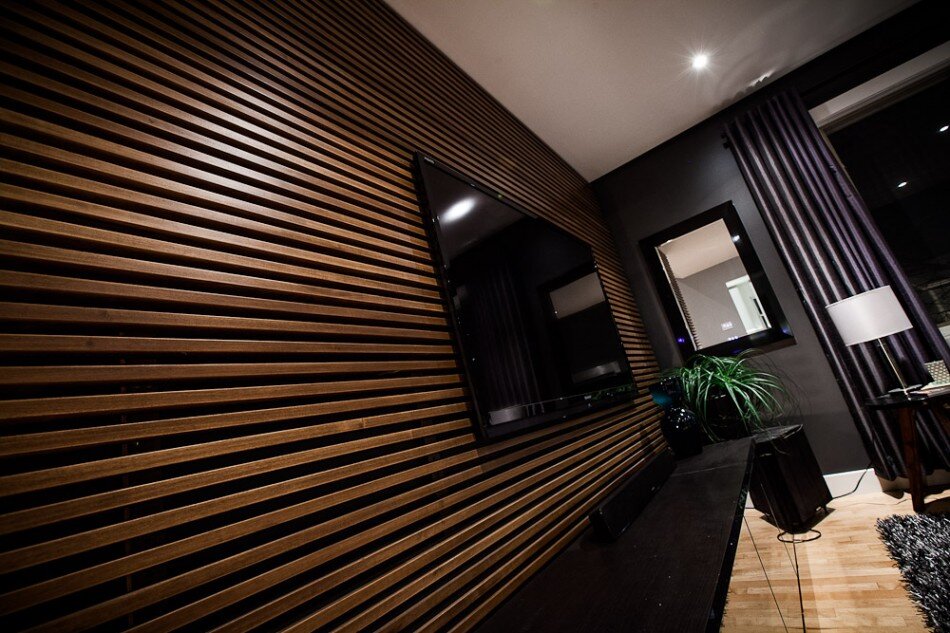
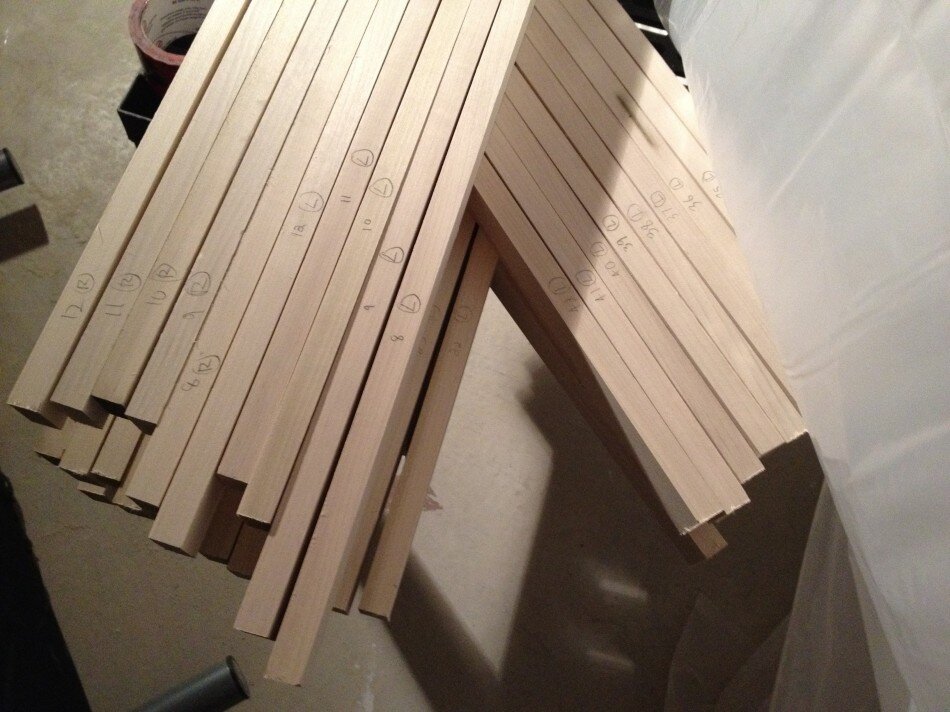
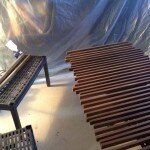
Next came the actual slat wall. We had already planned on using 1x2 poplar, evenly spaced 3/4" apart. Knowing the surface area of the wall, I figured we needed about 640 linear feet of 1x2's. The wood was purchased at a local lumber yard, Classic Woodwork.
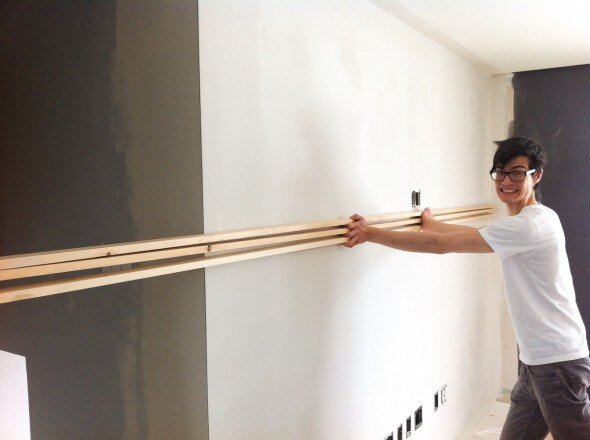
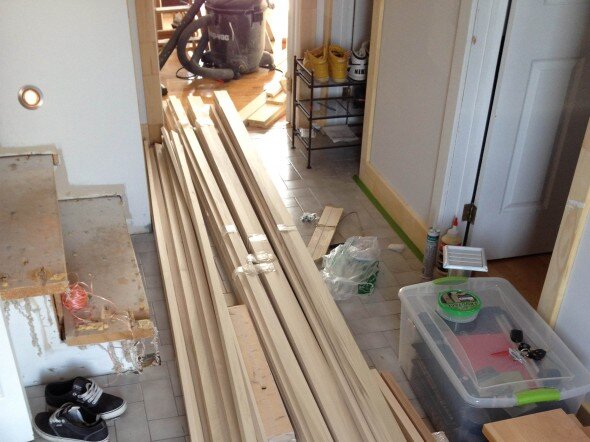
I cut all the pieces ahead of time and "mocked up" the slat wall with spacers (little blocks cut from scrap 1x2). I numbered all the slats on the back to keep track of where they all went. This allowed me to make sure the slats fit perfectly, accounting for any inconsistencies in the wall width from plastering/it being an old house. It also let me leave areas with no slats for the TV and wall plates. Once all the pieces were cut, I decided I wanted to hand sand the slats to ease the sharp corners. This was one of those last minute add on steps where I thought "meh, this will just be a little extra work" but about half way through I realized that hand sanding 640 linear feet twice (two grits of sandpaper) is anything but a "little" extra work. This was also the first time it really hit me of how much work this job was actually going to take.

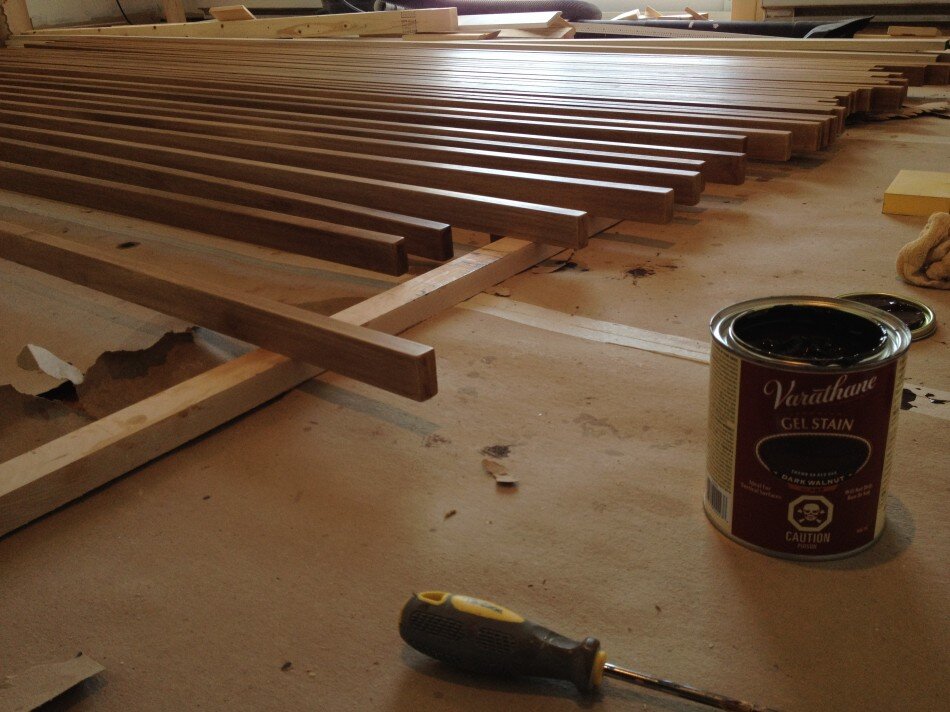
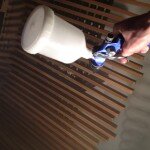
What I didn't know at the time was that poplar stains very unevenly. This is apparently due to varying pore sizes, which take up different amounts of stain and causes the blotchy appearance. Luckily I found this out when initially testing various stains on scraps. I recommend to anyone staining a project that they make sure to test, test and test again. It's a pain in the ass but in this case it prevented my project from being ruined. After multiple failed attempts using stain directly on the wood, I tried Minwax Wood Conditioner, which is marketed as a product to prevent the uneven staining. I tried staining over it both before and after it dried with poor results both ways. Finally, I found this tutorial that I loosely based my final process around. I shellacked the wood first as a pretreatment to fill all the pores. I then let it dry and lightly resanded, for a third time (at 320 grit), as the shellac slightly raised the grain of the wood. I next applied a dark walnut gel stain. The key here is to use a gel product as it will give better coverage and cover over the shellac without any issues. Pretreated wood doesn't take stain as avidly as untreated wood, so I stained it twice to get the desired color density. If you're still counting at this point, that's six separate sanding/conditioning/staining steps so far, or 3840 linear feet of manual preparation. You can see why this was one of the more labor intensive projects.
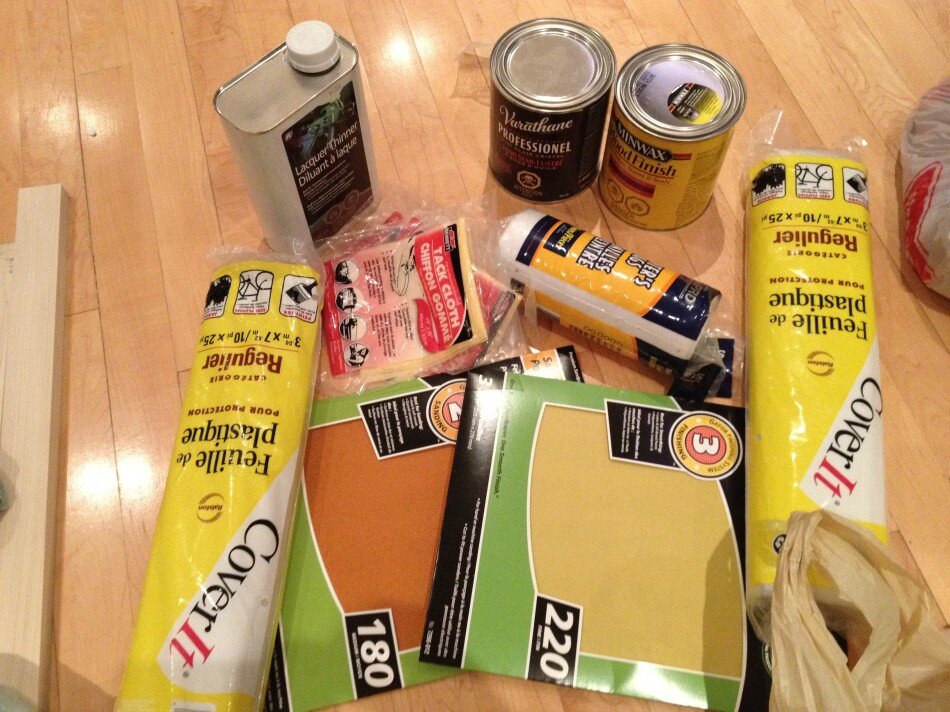
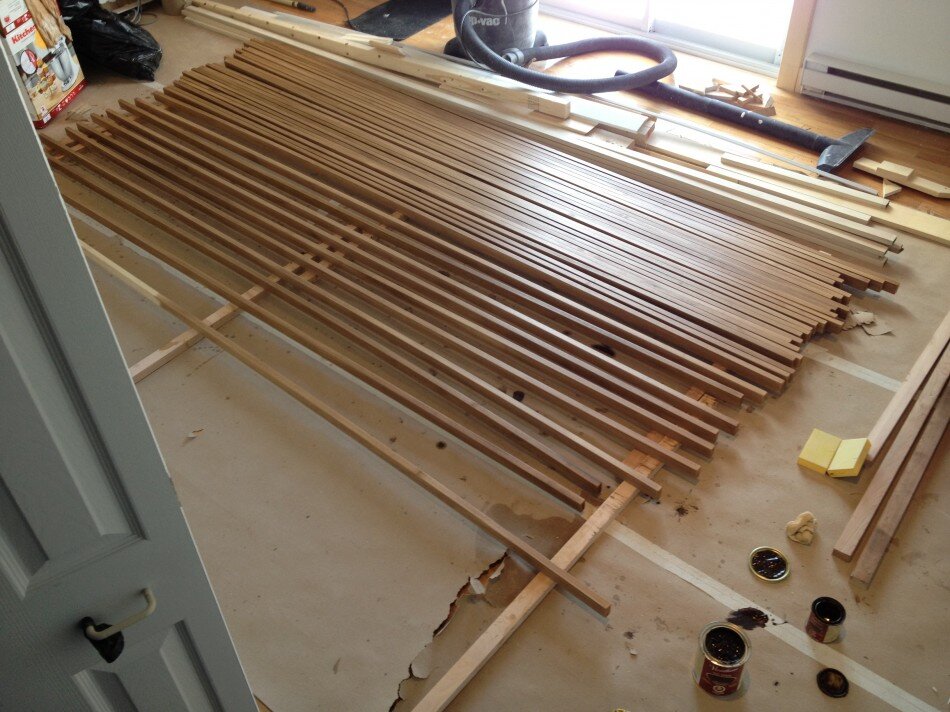
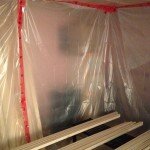
Once the wood was stained, I thinned a semigloss polyurethane, just enough so I could spray it through my HVLP gun (thinned maybe 5-10% or so). Since I don't have a proper spray booth, I fabricated a "kill room" in the unfinished basement with some left over vapor barrier. I sprayed a total of two coats of poly.
At this point I still hadn't decided on how I was going to attach the slats to the wall. Initially I was just going to PL them to the drywall directly, but no wall is perfectly flat (since there are plastered seams) and if I ever wanted to remove the slats from the wall non destructively, say to repaint behind them, then I couldn't. What I finally decided to do was screw strapping to the drywall with multiple drywall anchors (here are my favorites) and then mount the slats directly to the strapping. And yes, since the strapping was an after thought, I had to prepare them separately (sand, sand, shellac, sand, stain, stain, spray, spray). I mounted the strapping/slats in sections so I can takedown the slat wall in four large panels simply by removing a few mounting screws which are positioned between slats. Using the spacers from before, I glued and tacked each slat in place with a brad nailer. Times 62 slats; did I mention this was labor intensive?
While I didn't realize how much work it was going to end up being, I'm glad we finished the project. Overall, we're extremely happy with how it turned out!
-Chris