Kill Your Own Six Pannel Doors
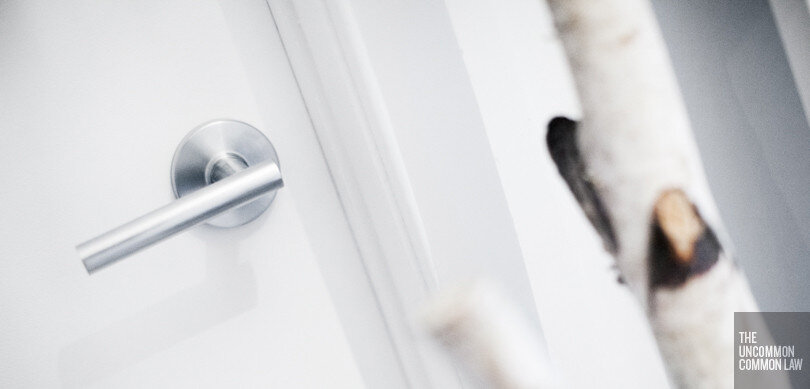
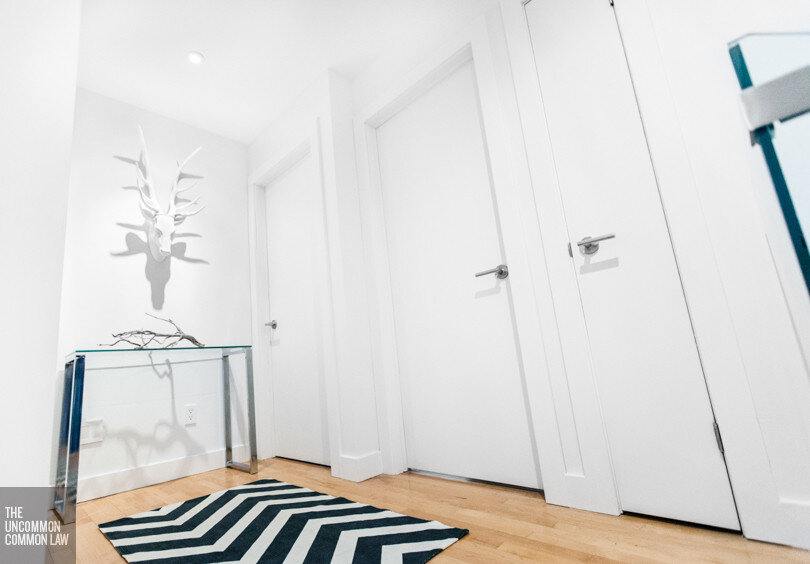
In our previous post "Death To the Six Panel", we spoke about our dislike for the standard six panel door when paired with a modern house. It's that one detail people seem to overlook, largely because there isn't a lot of variety in the products available. But those cheap flat slab melamine doors, as old as they are, look super modern when paired with the right hardware and paint. We used Taymor's Bergen handset in satin chrome (with matching hinges) and Benjamin Moore's "Decorator's White" in their ulti-matte finish. Now you too can get rid of your six panel doors!
You'll need:
Primed melamine flat slab door in the size you're replacing
Door hardware of your choice
Paint of your choice
Impact driver/screw driver
Utility knife
Wood chisel
Hammer
Drill
Lockset installation kit
Wood clamps
Combination square
Pencil
The first step is removing the old door to use as a template. Clamp the new door to the old door and, using your combination square, transfer the hinge position and centre of the door latch onto the edge of the new door. Take note that doors aren't actual perfect rectangles, they're actually trapezoidal with beveled edges. This makes one door face slightly smaller than the other. The small face should be facing into the doorway. Picture a wedge swinging into the door frame, the smaller side needs to strike first to help fit. Doors will also be marked top and bottom, so make sure you're not clamping them together upside-down. When lining up your old door as the template, it's important that you line up the top edges; don't worry about the bottom since you have some fudge room with the floor gap.
Once you have your hinge locations marked out, you can remove the old door. Use a utility knife to first cut the outline of each hinge, then use the plastic guide that comes with your door installation kit to determine the thickness of the wood you need to cut out. Once this cut is started, you can use a wood chisel to remove the extra wood bits.
Place the new hinges in the groove you just made, ensuring that the metal hinge is flush with the door. If not, you may need to chisel out more wood or add a few wood chips back in if you removed too much material from the door. Once the plate is flush, screw the new hinges to the door, being extremely careful that your screws are centred in the holes. If they aren't, then your hinge will be crooked when you torque the screws down.
Moving over to the latch side of the door, you need to mount the jig via two screws on the door's edge. These two screw holes will later act as mounting holes for the plate that covers the latch mechanism. This is one of the most important step. If your holes aren't perfectly centred and aligned, your door latch will be skewed and won't function properly. To ensure everything was square, I made a centre line with my combination square on the edge of the door, then used the latch plate backwards as a template to mark where my screw holes needed to go. Screw holes were then pre drilled to make sure the screws would go in straight before actually attaching the jig.
Once your jig is mounted, use the large hole saw to drill the hole for your handle's hardware. Note that you can choose two different back set measurements, which refers to the distance from your handle to the edge of the door. Most handle sets can be adjusted, so it doesn't really matter, but just make sure you're consistent on all your doors. Drill the big hole from both sides of the door, meeting in the middle. This will give nice clean cuts on both sides of the door and prevent you from blowing out the back. Once this is done, switch to the smaller hole saw that came with your kit and drill the hole through the edge of the door to connect with the larger hole. Make sure you're square and straight with the door because this will determine the angle your latch mechanism sits at.

Next, you need to chisel out some material from the edge of the door where the latch mechanism and plate will be installed. The installation kit includes this little router-like tool that fits in your drill. I ended up abandoning that as I found it was easier and faster to use the latch plate (screw mounted backwards) as a template, cut around it with a utility knife, and then just use a wood chisel to knock out the wood.
Install your latch mechanism and plate. Note that if your holes are all square and centred, the latch should function properly. If tightening down the plate causes the latch to bind, then something's crooked! Sometimes you can try shimming the plate with bits of wood or loosening the screws a bit, but if it's too messed up you may have ruined the door.
The last step is screwing the new hinges to the old door frame and replace the old strike plate with the new one. The moment of truth! If you transferred everything identically, then the door should theoretically open and close just like the old one did. You may need to adjust the position of the wooden door stop strip. If you have to do this, run your utility blade around the creases to cut the paint, then use a small pry bar and hammer to loosen the finishing nails.
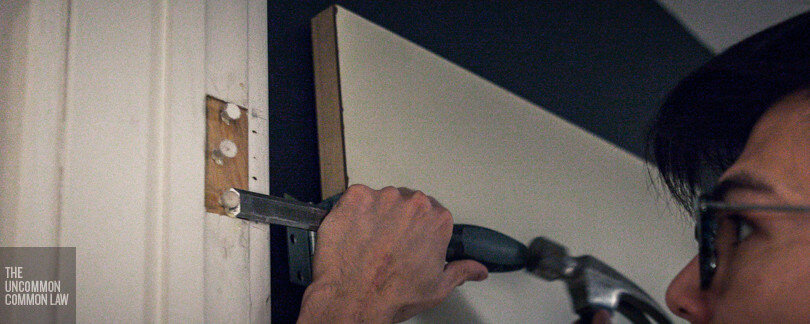
If for some reason the screw holes in your door jamb are in the wrong spot or are too large/stripped, you can fix them.
First fill the screw holes with wood glue (syringes are very handy for this). Then hammer in some wooden golf tees and let the glue dry.
Finally, cut them flush with your tool of choice (hammer and chisel, utility blade, pull saw, oscillating tool, etc.). Before installing your new hinge, it might be helpful to pre-drill pilot holes to ensure the screws are going exactly where you want them.